

Email marketing is a great match for Shopify. One of the leading email marketing tools that integrates with Shopify is "Mailchimp."
"What kind of tool is Mailchimp?" "I want to know the benefits of using Mailchimp." "Show me how to create emails in Mailchimp."
Reading this article will answer questions and needs like these.
Mailchimp is a tool that can be used by everyone from beginners to professionals. Use this article as a reference and consider giving it a try.
What Is the Email Marketing Tool "Mailchimp"?

Image source: Mailchimp
Mailchimp is a globally major email marketing tool with over 12 million active users. It's used by shops of all sizes, from small businesses to major brands, and is especially popular in the West.
With its intuitive operation and rich feature set, it caters to a wide range of needs, from email marketing beginners to professionals.
For more on "email marketing," please refer to the article below.

Main Features of Mailchimp
Mailchimp is an excellent email marketing tool with a wide range of features. Its main features include email creation and delivery, customer segmentation, SMS delivery, and analytics. For email creation, you can make use of templates and an AI assistant, and A/B testing is also available.
Of particular note is a step-based automated delivery feature called "Customer Journey," which lets you send emails triggered by preset conditions or customer behavior. This provides a personalized purchasing experience and can help boost sales.
It also supports comprehensive marketing initiatives, including landing page creation, social media posting, and setting up sign-up pop-up forms.
A Note on Mailchimp | Not Available in Japanese
Mailchimp is highly customizable and functional, but unfortunately its admin screen doesn't support Japanese. There's no issue using Japanese in email subject lines or body text, so businesses targeting Japan can use it without any problems.
Since browser translation features have become quite accurate recently, we recommend using them when working with Mailchimp. That said, some parts may be translated a bit oddly, so if that concerns you, it may be better to use an email marketing app that supports Japanese.
One email marketing app that supports Japanese is "Shopify Messaging (formerly Shopify Email)." This is explained in the article below, so please use it as a reference.

Benefits of Using Mailchimp with Shopify
Shopify e-commerce sites and email marketing are a great match, letting you deliver effective emails to your store's customers. Here's an explanation of the benefits you can gain by using Mailchimp.
Reduce Email Creation Costs by Using Generative AI Features
Mailchimp's generative AI feature, "Intuit Assist," greatly streamlines the effort of creating emails. In addition to automatically generating headlines and body text, it can also create email designs that reflect your brand's colors and logo. For routine emails like cart-abandonment countermeasures and customer follow-ups in particular, the AI suggests optimal copy and design. This means you can send emails simply by reviewing and editing what's been created.
Furthermore, AI also supports building automated email-delivery scenarios, which can save a significant amount of the time and effort you've previously spent on email marketing.
Boost Marketing Effectiveness with A/B Testing and Analytics Features
"A/B testing" is a method of running two approaches, A and B, at the same time to verify which one was more effective. By repeatedly running A/B tests across various initiatives, you can find the optimal approach. With Mailchimp, you can easily run A/B tests on subject lines, content, and send times, letting you efficiently find the best content and conditions for delivery.
It also offers detailed analytics, including click-through rates and purchase data, making it easy to measure effectiveness by segment. This gives you deeper insights than Shopify's own store analytics can provide, further boosting your marketing effectiveness.
Boost Sales Through SMS Integration (International Markets Only)
Mailchimp can also integrate with SMS (short message service) to deliver marketing messages. SMS has a high open rate, making it effective for flash sales and event announcements. It can also help drive sales through cart-abandonment prevention and encouraging repeat purchases.
Please note that the SMS marketing feature isn't available in Japan. It's a feature we recommend for merchants engaged in cross-border e-commerce (international sales). The supported countries are as follows:
Australia, Austria, Canada, France, Germany, Ireland, Spain, Switzerland, the Netherlands, the United States, and the United Kingdom
Mailchimp Pricing Plans
Below is a summary table of Mailchimp's pricing plans and the main features available with each.
| Pricing Plan | Free | Essentials | Standard | Premium |
|---|---|---|---|---|
| Starting price | From $0 | From $13 | From $20 | From $350 |
| Monthly sends | Up to 1,000 | 10x your contact count | 12x your contact count | 15x your contact count |
| User seats | 1 | 3 | 5 | Unlimited |
| Customer support | Email support for the first 30 days only | 24/7 email and chat support | 24/7 email and chat support | Phone and priority support |
| Analytics reporting | Limited | Limited | ◯ | ◯ |
| Generative AI features | × | × | ◯ | ◯ |
| Automation features | × | Limited | ◯ | ◯ |
| A/B testing | × | ◯ | ◯ | ◯ |
| Segmentation | Basic features | Basic features | Advanced features | Advanced features |
| Email scheduling | × | ◯ | ◯ | ◯ |
| SMS marketing | × | ◯ | ◯ | ◯ |
As of January 2025
With Mailchimp, pricing varies depending on the number of registered customer addresses. For details, please refer to Mailchimp's pricing page.
The Free plan inserts the Mailchimp logo into your emails and has limited functionality. If you're serious about running email marketing, we recommend choosing the Essentials plan or higher.
How to Connect Shopify and Mailchimp | Including Account Creation
By connecting Shopify and Mailchimp, you can send emails based on your store's customer data. This section explains how to connect Shopify and Mailchimp.
1: Install the Mailchimp app from the Shopify App Store.

Image source: Mailchimp | Shopify App Store
Your Shopify store will show an installation confirmation again, so click "Install."

Image source: Shopify admin
2: Connect Mailchimp and your Shopify store's data.
If you already have an account, click "Login." If not, click "Create account."
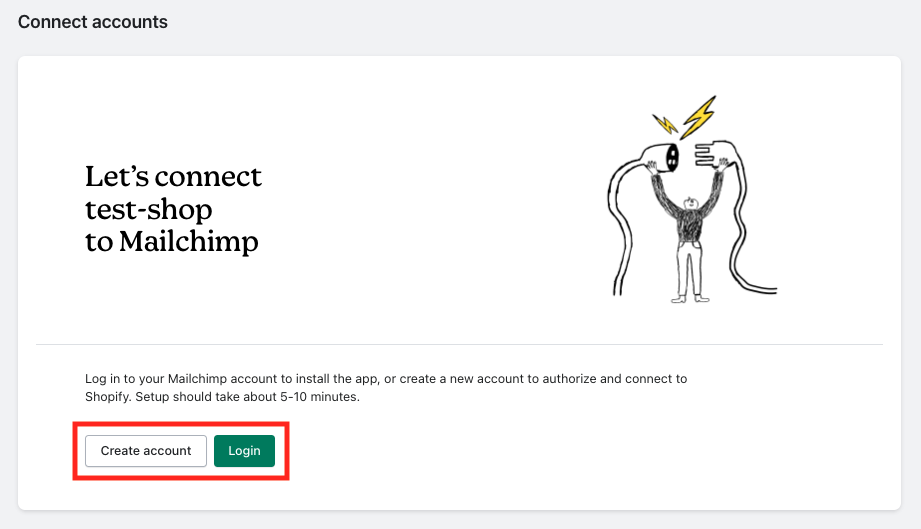
Image source: Mailchimp admin
Steps to Create a New Account
On the account information screen, enter your profile and business address. Your Shopify data will be linked automatically, but if there are any changes, edit them using "Edit." Click "Activate account."

Next comes email address verification. Click "Confirm email" in the email sent to your address.

3: Once account creation is complete, choose a pricing plan.
There's a free plan available, but the paid plans come with a 14-day free trial, so it may be worth trying a paid plan first. Once you've decided on a plan, click "Start free trial."

Even for the free trial, registering a credit card is required. Once you register it and process the $0 charge, your account creation is complete.
4: Connect with Your Shopify Store
Open the Mailchimp app screen from the Shopify admin. Click "Sync now."

Once the sync is complete and "Connected" is displayed, the connection is complete.

How to Actually Use Mailchimp
Here's an explanation of how to read the Shopify app "Mailchimp" screen, and how to create emails in Mailchimp.
How to Read the Shopify App "Mailchimp" Screen
The Shopify app "Mailchimp" includes the following items:
- Audience Stats: statistical data
- Promo Codes: promo code syncing
- Tag Syncing: tag syncing
- Rule Builder: creating tag-setting rules
- Settings: settings
- SMS Subscriber Syncing: SMS subscriber syncing
Image source: Shopify admin
On the Mailchimp screen within the Shopify app, you can check the promotions and tag settings you've configured in Shopify, but you can't run marketing initiatives from there.
How to Create Emails in Mailchimp
Creating marketing emails and configuring delivery settings are done from Mailchimp's admin screen. Let's actually create a marketing email. From the Shopify app screen, click "Continue to Mailchimp" to move to Mailchimp's admin screen.
Click "Create" at the top left of Mailchimp's admin screen.

Enter the purpose of the email in "Internal email name." This is purely a name for internal management purposes and is not shown to customers.

Choose how to create the email from the following three options:
- From scratch: create the design and content entirely from zero yourself
- Basic layout: build from a state where the basic design is already in place
- Fully designed template: build using a template that's already fully designed

This time, we'll create it using a template. There are 122 templates available (as of January 2025), which you can filter by "Email purpose," "Style," and "Industry."

There are 8 types of "Email purpose":
- Announce
- Newsletter
- Invite to event
- Sell products
- Sell services
- Thank you
- Welcome
- Seasonal
There are also 8 types of "Style":
- Minimalist
- Bold
- Colorful
- Neutral
- Light
- Playful
- Dark
- Professional
There are 10 types of "Industry":
- Arts & entertainment
- Business & finance
- Creative services
- E-commerce & retail
- Education & nonprofit
- Food & travel
- Health & wellness
- Home & garden
- Industrial services
- Technology
This time, we filtered by "Seasonal," "Neutral," and "E-commerce & retail." Click a template you like. Clicking "Apply" that appears will take you to the email body editing screen.

On the editing screen, you can freely edit the email body's layout, colors, fonts, text, and more. Changing the layout is done with simple drag-and-drop.

Items you can add to the layout include the following:
- Heading
- Paragraph
- Button
- Divider
- Spacer
- Image
- Logo
- Creative Assistant (design assistant *)
- Video
- Social (social media links)
- Survey
- Code
- Apps (app integrations)
- Product
- Product Rec (recommended products)
- Review Product (product reviews)
*An AI-powered design-generation feature
The email layout can be flexibly configured, with options like "2-column," "3-column," and "1:2 split."
Once you've created the email body's design and text, configure the email's delivery settings.
- To: recipient
- From: sender
- Subject: email title
- Send time: delivery time (can be scheduled)
- Content: body
Once all settings are complete, click "Schedule."

Click "Confirm scheduling email" to finish.

That covers how to create an email.
The templates have a somewhat Western feel and may sometimes feel a bit unfamiliar in design to Japanese consumers. If you can't find a design you like, we recommend creating one using "Basic layout" instead. You can start from a simple design like the one in the image below.

Use Mailchimp to Get Started with Email Marketing
This article explained the feature-rich email marketing tool "Mailchimp," covering the benefits of using it, how to connect it, and how to create emails.
Mailchimp lets you create visually rich emails with simple operations, making it ideal for beginners. It also has a generative AI email-creation feature and a step-based automated delivery feature, enabling efficient operation. Furthermore, by making use of its analytics and A/B testing features, you can run effective marketing and expect to boost sales.
If you're just getting started with email marketing, or want to run more advanced email marketing, be sure to give it a try.


